Manage User Accounts
Use the User Account page to modify users account information like name, email or password. You can also deactivate or reactivate a user.
Tip: Mitchell Connect access is blocked after multiple failed login attempts. If a user is locked out of Mitchell Connect, a user with Administrator privileges can reactivate the account using the Settings page in Mitchell Connect.
How to
You can search for users on the User Accounts page.
- Click Settings.
- Click User Accounts.
- On the User Accounts page, enter your search in the Search field, and then click


- On the navigation pane, click Settings.
- Click User Accounts.
- On the Settings page, under User Accounts, click the account you want to edit.
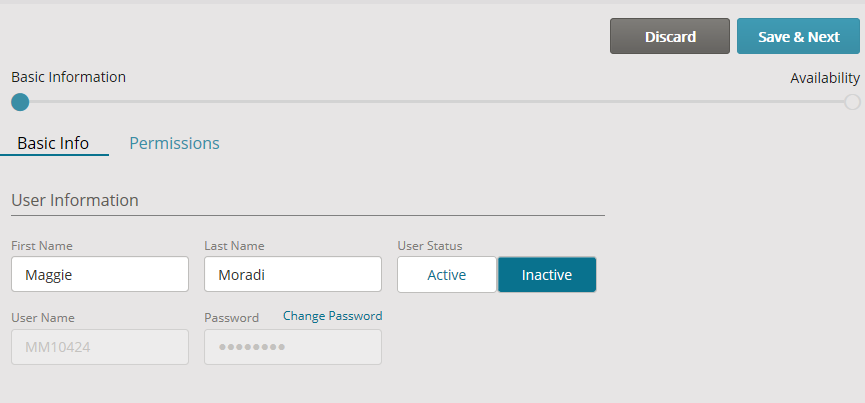
- On the User page, add, or modify, the information as needed. You can change name information, email, and password but you cannot delete information from required fields.
- Click Done to save your work and return to the Settings page.
- On the navigation pane in Mitchell Connect, select Settings.
- Click User Accounts.
- On the Settings page, under User Accounts, click the account you want to edit.
- Click Change Password.
- Type the user's current password in the Current Password field.
- Type the new password in the New Password field.
- Click Hide if you want to hide the password while you type.
- Click Done to save your work and return to the Settings page.
Change the password your own user account from the My Profile page in Mitchell Connect. Use this feature if you are not an administrator and do not have access to the Settings page.
- In the navigation pane at the top, click your account name.
- On the My Profile page, under Personal Settings, click Change Password.

- Enter your current password in the Current Password field.
- Enter your new password in the New Password field.
- Click Save.
- On the navigation pane in Mitchell Connect, select Settings.
- Click User Accounts.
- On the Settings page, under User Accounts, click the account you want to edit.
- On the User Account page, click Permissions.
- Click Inactive User.
- Click Done.
- On the navigation pane in Mitchell Connect, select Settings.
- Click User Accounts.
Tip: If you cannot see any inactive users, check the Show Inactive users toggle button at the top of the User Accounts page. Click to the right of the Show Inactive accounts toggle button to show inactive accounts.
- On the Settings page, under User Accounts, click the account you want to edit.
- On the User Account page, click Permissions.
- Click Active User.
- Click Done.
Reference
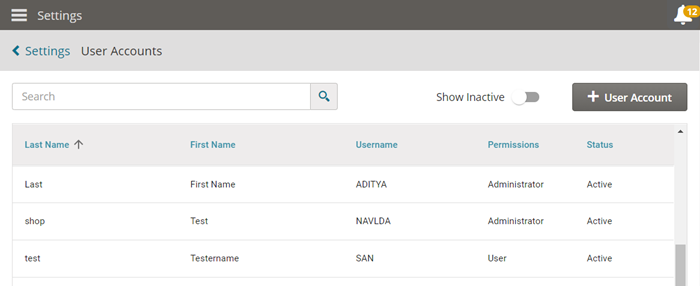
| Name | Description |
|---|---|
| Last Name | First name of the user. |
| First Name | Last name of the user. |
| Username | The username used to log in to Mitchell Connect. |
| Permissions |
The Permissions column shows:
|
| Status |
The Status column shows:
|

|
Click to the right of Show Inactive to view inactive users. Click to the left to view active users in the list. |
|
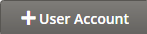
Click to add a new user account. |
User Account Basic Info Tab
| Name | Description |
|---|---|
| Basic Info |
The Basic Info tab shows name, user name, password, phone, |
|
First Name/Last Name |
The account owner name. |
| Username |
The account name in Mitchell Connect. |
| Password |
Click Change Password to modify the user account password. Clicking Change Password makes this field editable. |
| The account owner email address. | |
| Home Phone | The account owner phone number. |
| Mobile | The account owner mobile phone number. |
Permissions tab
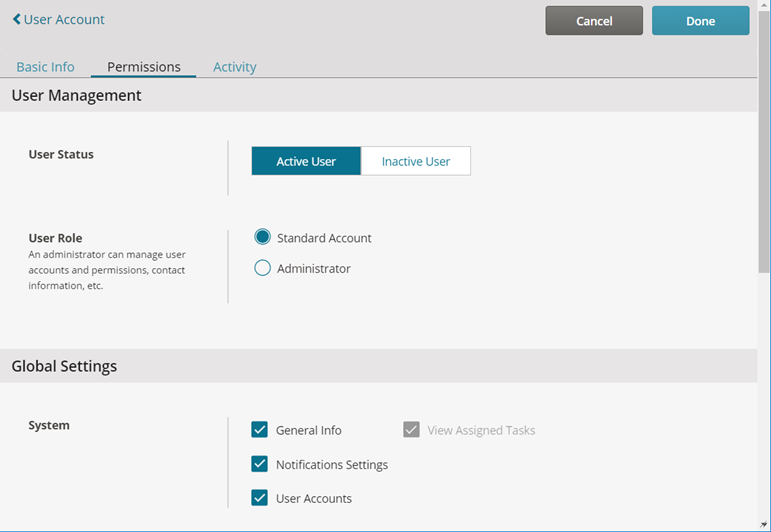
| Name | Description |
| Permissions tab |
Click the Permissions tab to access the settings for:
|
| User Management | This section includes the User Status and the User Role settings. |
| User Status |
Click Active User to activate or Inactive User to deactivate a user account. |
| User Role |
Click an option to change the user role.
|
| Standard Account | The Standard Account role is required to modify access to features. |
| Administrator | The Administrator role is required to manage other user accounts and associated permissions. |
| Global Settings | Select the check box next to each setting to enable it. Clear the check box to disable the setting. |
| General Info | The General Information setting allows account owners to modify the shop's general information. |
| Notification Settings | The Notifications Settings allows account owners to change their Notification preferences for in-app notifications or email alerts. |
| User Accounts | The User Accountssetting allows account owners to manage other user accounts. |
| View Assigned Tasks | The View Assign Tasks setting allows account owners to view tasks assigned to other users. |
| Products |
This section includes settings for the following products:
|
| Mitchell Connect |
Select the check box to enable access to the following product features:
Clear the check box to remove permissions. |
| Assign Tasks | The Assign Tasks setting allows account owners to assign tasks to other people. |
| View Others Work |
The View Others Work setting allows account owners to view jobs and tasks assigned to other people. |
| Mitchell Cloud Repair |
Select the check box to enable access to the following product features:
Clear the check box to remove permissions. |
| Approve Repair | The Approve Repair setting allows shop managers to Verify Completed Repair Procedures in Repair QA. You must also select Repair Plan to grant access to Repair QA. |
| Repair Plan | Click the Repair Plan check box to give shop technicians access to Repair QA. |