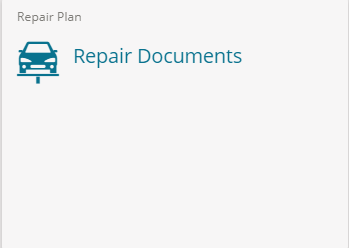
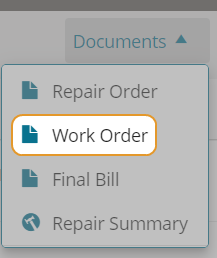
Generate Repair Documents in Mitchell Cloud Repair
Generate Repair documents using information from your estimate. You can create the following:
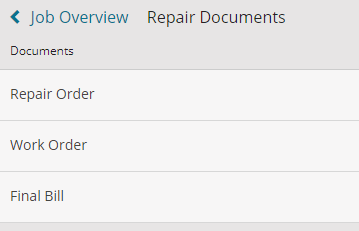
- Repair Order: Customer document includes parts, labor, price, and grand total prior to the work being completed.
- Work Order: Shop document designed specifically for your technicians. It includes repair lines, operations, part number and type, and a section to enter technician names assigned to each repair line.
- Final Bill: Customer document includes parts, labor, price, and grand total after the work is completed.
How to
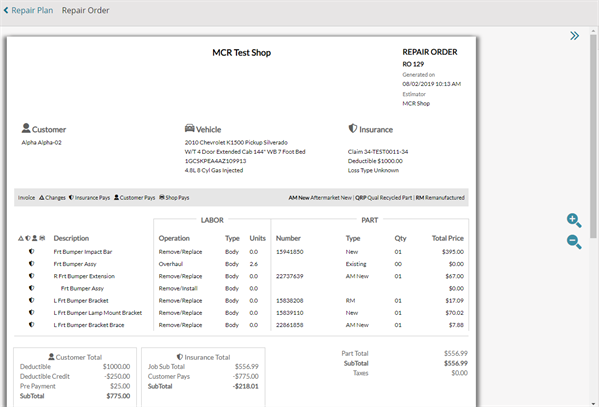
You can automatically generate the Repair Order with the information in your estimate. The Repair Order document is a customer-ready document that includes parts, labor, price, and grand total prior to the work being completed. You can print or download the document as a PDF.
- On the Job Overview page in Mitchell Connect, select the Repair Documents card (card view may vary if Repair QA is being used).
- On the Repair Documents page, select Repair Order.
- Review the document in the preview pane. Use the magnifying icons to zoom in or zoom out on the document as needed.


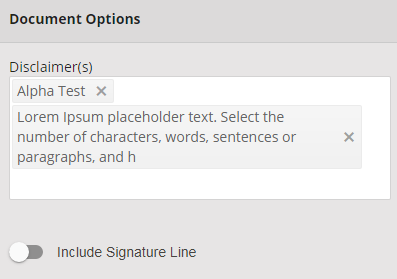
- Disclaimer text may be included by default. This text appears at the bottom of the document. To change the text, select the X next to the existing disclaimer title, then select the new disclaimer text in the list. You can also select disclaimer text in the list if a disclaimer does not appear by default.
- Do one of the following (optional):
- Turn on the Include Signature Line toggle to include a signature line at the bottom of the document.

- Turn off the Include Signature Line toggle to exclude the signature line from the bottom of the document.

- Do one of the following:
- Select Download: Download the document as a PDF to your computer. Open and save the PDF at the bottom of your browser (browsers may vary.
- Select Print: Print the document. Click Print from the Preview window (browsers may vary).
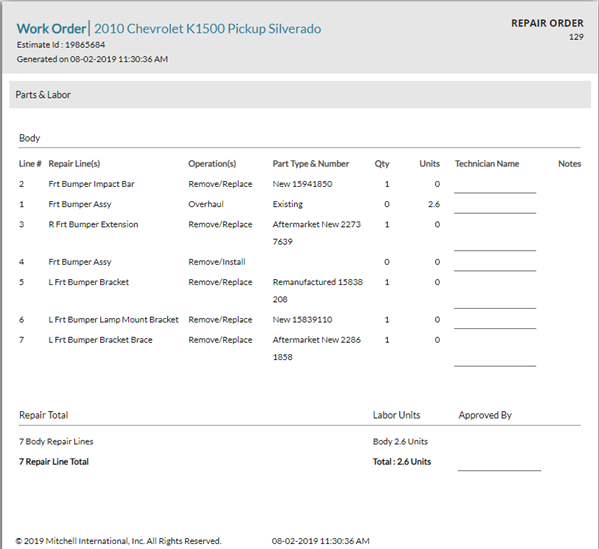
Automatically create the Work Order document using information from your estimate. The Work Order document is a shop document that includes repair lines, operations, part number and type, and a section to enter technician names assigned to each repair line.
- On the Job Overview page in Mitchell Connect, click the Repair Documents card (card view may vary if Repair QA is being used).
- On the Repair Documents page, click Work Order.
- Review the document in the preview pane.
- Do one of the following:
- Click Download: Download the document as a PDF to your computer. Open and save the PDF at the bottom of your browser (browsers may vary.
- Click Print: Print the document. Click Print from the Preview window (browsers may vary).
Hide the labor units and calculations that appear on the Work Order report. This feature prevents technicians from viewing labor numbers on the Work Order report.
-
On the Job Overview page for a job with repair lines, select the Repair Plan card.
-
On the Repair Plan page, select Work Order from the Documents list.
-
Do one of the following:
-
Turn on the Hide Labor Units toggle
 to hide labor hours.
 -
Turn off the Hide Labor Units toggle
 to show labor hours.
Automatically create the Repair Order document using information from your estimate. The Repair Order document is a customer document that includes parts, labor, price, and grand total after the work is completed. You can print or download the document as a PDF.
- On the Job Overview page in Mitchell Connect, click the Repair Documents card (card view may vary if Repair QA is being used).
- On the Repair Documents page, click Final Bill.
- Review the document in the preview pane. Use the magnifying icons to zoom in or zoom out on the document as needed.
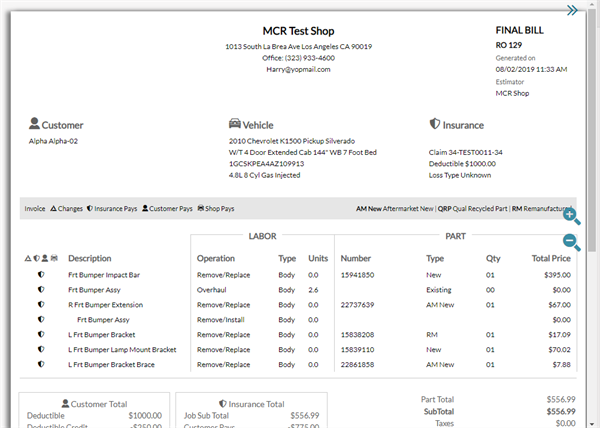
- Disclaimer text may be included by default. This text appears at the bottom of the document. To change the text, click the X next to the existing disclaimer title, then select the new disclaimer text in the list. You can also select disclaimer text in the list if a disclaimer does not appear by default.
- Do one of the following (optional):
- Move the toggle button next to Include Signature Line to the right to include a signature line at the bottom of the document.
- Move the toggle button next to Include Signature Line to the left to exclude the signature line from the bottom of the document.
- Do one of the following:
- Click Download: Download the document as a PDF to your computer. Open and save the PDF at the bottom of your browser (browsers may vary.
- Click Print: Print the document. Click Print from the Preview window (browsers may vary).
Reference
| Field | Definition |
|---|---|
| Customer Payee Jobs |
For customer-only payments, the system displays only relevant repairs and associated taxes. Deductible, betterment, prepayment, and other insurance-specific items aren't shown. |
| Tax Distribution | When insurance pays taxes (such as PST tax of $20), the system automatically allocates a percentage to the customer based on the liability distribution configured in the Insurance Editor's Tax settings. This applies to both estimate and non-estimate line taxes. |
|
Customer Pay Box Display |
|
| Insurance Box Display |
|
| Tax Exemptions |
When PST Exemption is enabled in the insurance card, the exemption status also applies to customer pay non-estimate lines. |