Add Attachments
Use the Attachments card on the Job Overview page in Mitchell Connect to add photos, vendor invoices,
Note: File limit size for documents and images is 10 MB.
Note: The default maximum image size is 1280 pixels by 960 pixels.
How to
If you need to send photos or other documents to the insurance company, do the following:
Follow the steps below to send/upload Media to
Tip: For best results, download photos from your camera to your hard drive prior to adding them to Mitchell Connect.
- On the Job Overview page, click Upload Attachments.
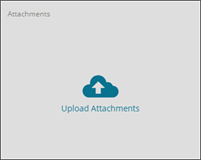
- On the Attachments page, click Upload Attachments.
-
Click Upload.

- Navigate to and select the files you want to attach.
- Click Open.
- To select multiple files, hold down the Ctrl key while selecting attachments.
Note: You can attach up to 200 files to upload at once. You will receive a warning message if you select more than 200 files to upload.
- You can see image upload progress in the Uploading Attachments window. Click the Show Completed slider bar to display only the images that failed to upload. Click the Retry icon next to the failed upload to try uploading again.

Note: For failed attachment file uploads, Mitchell Connect automatically attempts to retry the upload three times. On the third failed attempt, the Mitchell Connect Upload window clearly identifies any attachments that failed to upload. Click Retry All to attempt to upload all attachments again or click Exit Anyway to close the window without loading those attachments.
- If all files are successfully uploaded, the Uploading Attachment window closes for you. A total attachments count appears at the top left of the Attachments page.
Note: When you manually upload a photo to a job, the photo automatically defaults to the Additional category. You can move your photos to any other category as needed.
- To add more attachments, click Upload to reopen the Open dialog box.
- To add a description to an attachment, click Add a Description on the image and then type a description in the text box.

- When you're finished, click Job Overview to return to the Job Overview page.
Note: Attachments that have already been sent to the insurance company cannot be deleted and descriptions cannot be edited.
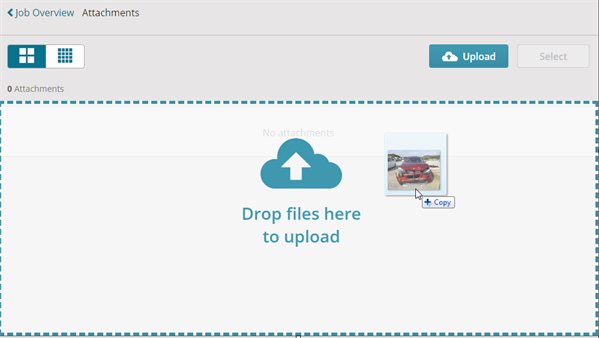
You can drag attachments from a folder on your computer directly to the Attachments page.
- On the Job Overview page, click Upload Attachments or click the Attachments card if images are already present.
- Drag an attachment from a folder or other location on your computer to the Attachments page. The page shows the message Drop Files Here to Upload.
- Click Job Overview to return to the Job Overview page.
-
Open Mitchell Connect on a mobile or tablet device.
-
On the Job Overview page, select the Upload Attachments.
-
On the Attachments page, select the Camera at the bottom of the page. The internal camera feature opens.
-
The default mode is set to photo capture. Do one of the following:
-
Select the center capture button to take up to 20 photos in succession.
-
Switch to video mode by selecting the video icon. Take up to 20 videos in succession.
-
Up to 20 thumbnails appear to the left of the Capture button.
-
Select a thumbnail to view in Preview mode.
-
In Preview Mode, use the editing tools to edit the files as needed.
-
From Preview mode, select the media files you want to upload, and then select Upload.
Add Attachments from the Jobs List without opening a job.
-
Go to the Jobs List.
-
On the Jobs List, select Upload Files for the job you want to add files to.
Note: On screens 600 pixels or smaller, select
 on the desired job, and then select Upload Files.
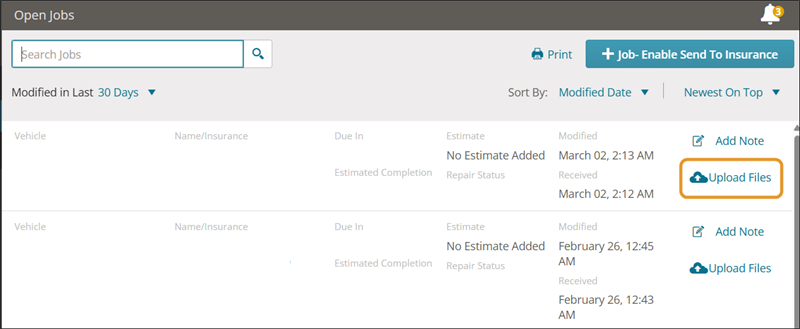
-
Navigate to and select the files you want to attach, and then select Open.
-
To review or edit your uploaded files, open the job, and then select the Attachments card on the Job Overview page.
Users with additional licensing can upload videos to the Attachment Gallery in Mitchell Connect. The maximum video upload size is 500 MB
Note: This feature requires additional licensing and is not available to all users.
-
On the Job Overview page, click the Attachments card.
-
On the Attachments page, click Upload.
Note: Upload times vary based on file size and network quality. Maximum video upload size is set to 500 MB
-
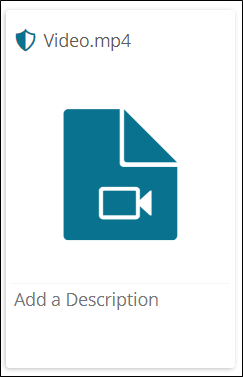
Enter a description for you file in the Add Description box.
-
Click Job Overview to return to the Job Overview page.
-
On the Job Overview page, select the Attachments card.
-
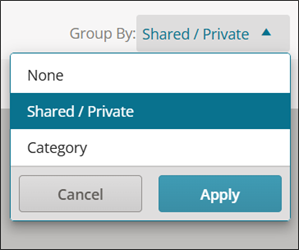
On the Attachments page, select on of the following in the Group By list:
-
None: No grouping.
-
Shared/Private: Group photos flagged as shared with insurance company partners or by the user.
-
Category: Group photos by categories including Vehicle Information, Four Corners, Vehicle Damage, Prior Damage, or Additional Photos (default setting).
-
Select Apply.
-
Use the drop down arrows to expand or collapse your view of photos by category.
View attachments in the attachments gallery. You can change the view to thumbnails to see all images at once.
- On the Job Overview page, click anywhere on the Attachments card.

- You have the option of changing the view by clicking one of the following:
- Click
 to view larger images and descriptions.
 - Click
 to show attachments as thumbnails for a quick glance at all of your attachments. Use this option if you have multiple attachments and need a quick way to scroll through them.
- Click any image to see the full image. You can view the next image or previous images using the arrow buttons next to the image. Click Done to close the image.
- Click Job Overview to return to the Job Overview page.
Access the Attachment Gallery directly for the job header at the top of the page. This helps you enter information on any of the administration pages without going to the Attachments page. You can access the Attachment Gallery from any of the following administration pages:
-
Owner (Contact) card
-
Vehicle card
-
Insurance card
-
On the Job Overview page or from the Contact, Vehicle, or Insurance page, click View Attachments.

-
View and add attachments as needed.
-
Click Job Overview to return to the Job Overview page.
Add additional attachments.
Note: The attachments limit for a single upload is 200. A warning message appears if you attempt to upload more than 200 attachments at once.
- On the Job Overview page click anywhere on the Attachments card.
- On the gallery view, click Upload and browse to the files you want to attach.
- Select all of the files you want to attach and click Open. Your images will load in Upload Complete window.
Tip: You can select multiple files by holding down Ctrl while clicking each file or drag and drop your images directly on the attachments page.
- If you are uploading multiple images, Mitchell Connect shows a progress bar for each image as it uploads. Click to the left of Show Completed toggle button if you only want to show images that failed to load. Click the Retry icon next to the failed upload if you want to try to upload a failed file again.
Note: For failed attachment file uploads, Mitchell Connect automatically attempts to retry the upload three times. On the third failed attempt, the Mitchell Connect Upload window clearly identifies any attachments that failed to upload. Click Retry All to attempt to upload all attachments again or click Exit Anyway to close the window without loading those attachments.
-
Click Done when the attachments complete loading.
- To add more attachments, click Upload to reopen the Open dialog box.
- To add a description to an attachment, click Add Description and then type a description in the text box.
- When you're finished, click Job Overview to return to the Job Overview page.
You can add or modify descriptions to artifacts you add on the Attachments page. Shops and Independent Appraisers can edit attachment descriptions after sharing with insurance companies. This keeps details accurate and up to date.
Note: Editing is restricted to attachments owned by the user’s shop, while staff users continue to have full editing access across all attachments.
- On the Job Overview page, click Attachments. The Attachments page appears.
- Select the image you want to add a description to or want to modify.
- Type the description in the Description field.
- Select Done.
- When you're finished, select Job Overview to return to the Job Overview page.
Troubleshooting
If you receive an error message when uploading photos, try the following:
| Reason/Issue | Solution |
|---|---|
| Image size is too large. |
File size limit is 10 MB per image. If the resolution on the image is over 2800 X 3200, the image may be too large.
|
| Browser | Try a different internet browser. Chrome is reported to allow a larger number of attachments. |
| Too Many Attachments | Reduce the number of attachments you are uploading at one time. |
Reference
Note: File limit size for images is 10 MB.
| File format | File name extension |
|---|---|
|
Joint Photographic Experts Group |
.jpg or .jpeg |
|
Graphics Interchange Format |
.gif |
|
Tagged Image File Format |
.tif or .tiff |
| Portable Network Graphic |
.png |
Note: File limit size for documents is 10 MB.
| File format | File name extension |
|---|---|
|
Microsoft Word document |
.doc or .docx |
|
Portable Document Format |
|
|
ASCII or Unicode Plaintext |
.txt |
|
Rich Text |
.rtf |
| Microsoft Excel document | .xls or .xlsx |
| Comma Separated Value (for use in Excel) | .csv |
| File format | File name extension |
|---|---|
| AVI - (Audio Video Interleave) |
.avi |
| MP4 (Motion Pictures Expert Group 4) |
.mp4 |
| MPEG (Motion Pictures Expert Group ) |
.mpeg |
| MOV (MOVie - QuickTime File Format) |
.mov |
| WMV (Windows Media Video) | .wmv |
| MPG (Motion Pictures Expert Group) | .mpg |