Use the Claims List Work Queue
The Work Queue allows you to view your desired work items in the workspace. In Work Queue > Claims, you can view and customize different Claim Lists. This is one method to find and view claims.
Note: Green text in the Work Queue list indicates that the estimate has been sent from Mitchell Cloud Estimating with an attachment.
How to
To view the claims Work Queue:
-
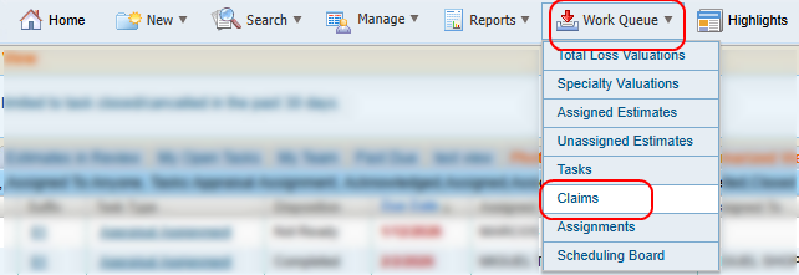
On the Work Queue menu in the navigation bar, select Claims to open the claims list page.
-
Select the appropriate tab to view the desired claim list.
Your filter selections persist between sessions.
-
On the Work Queue menu in the navigation bar, select Claims to open the claims list page.
- Select the appropriate tab to view the desired claim list.
- Select
 Filters to expand the filter view.
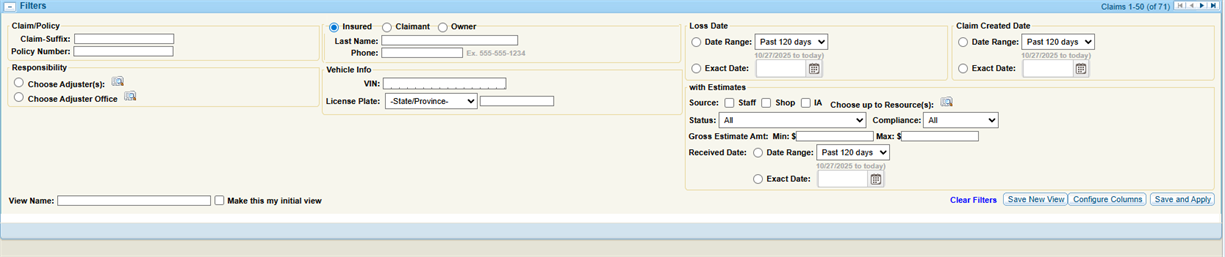
- Modify filters as desired.
-
Select Save & Apply.
You can customize which columns appear in your claims list to show only the information you need.
-
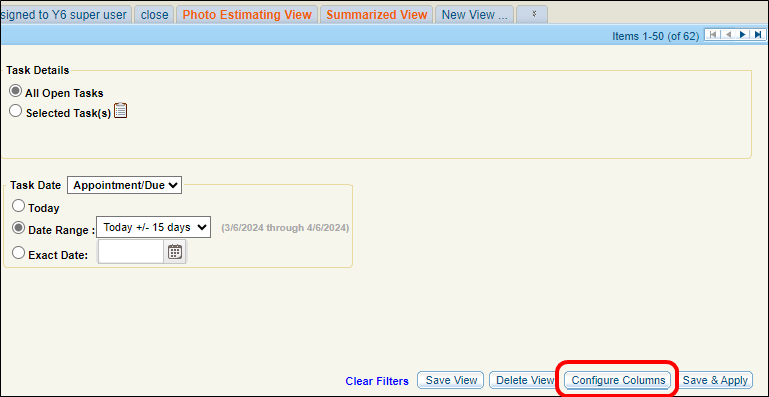
In the Filters section of the appropriate tab, select Configure Columns.
- Do one of the following in the Configure Columns window:
- To add a column, select a column title from the Available Columns list and select Add to add it to the Selected Columns list.
- To remove a column, select a column title from the Selected Columns list and select Remove.
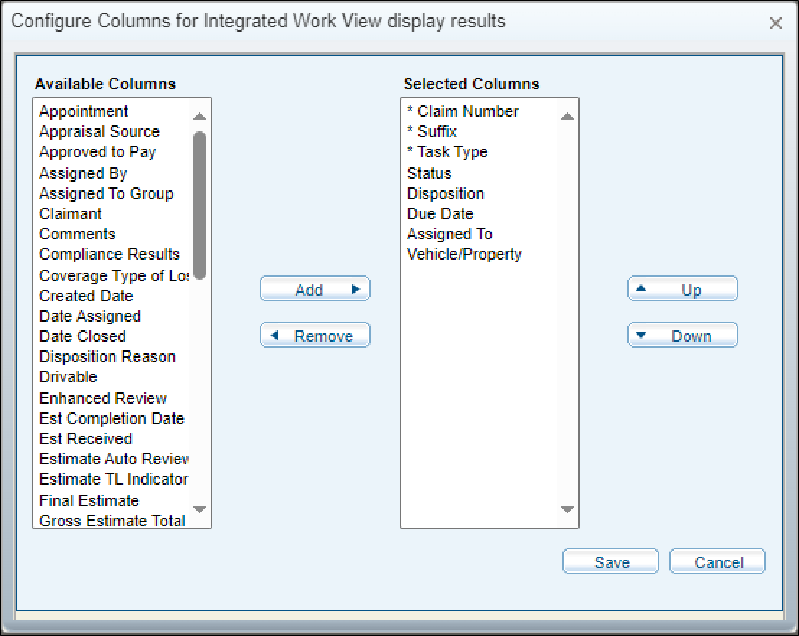
Note: The Selected Columns list shows the current column order.
- Select Up or Down to change the order of the columns shown.
Tip: The top of the list indicates the leftmost column.
-
Select Save.
-
On the Work Queue menu in the navigation bar, select Claims to open the claims list page.
-
Select the New View tab.
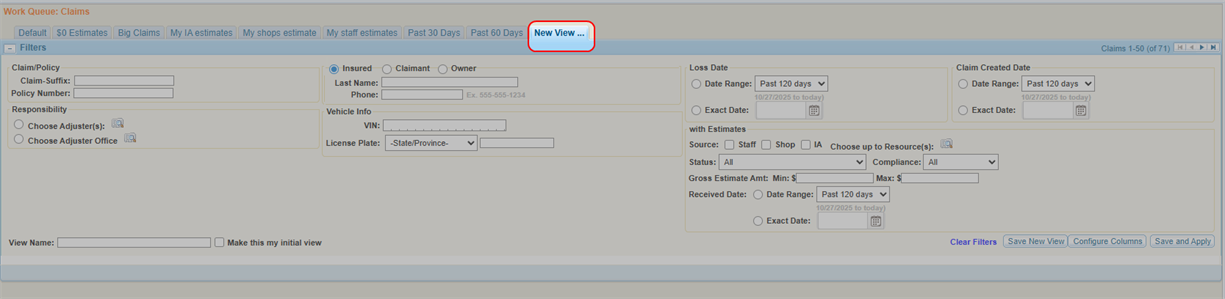
-
Use filters to choose the items you want to be displayed in the claims list.
Note: If you cannot see the filter options, select
to expand the Filter section. -
Select Configure Columns to choose which columns are shown in the list and in what order they appear.
-
Enter a name for the view.
-
Select Save New View.
Reference
| Name | Description |
|---|---|
| Claim Number | The Claim number. |
| Suffix ID | The subcategory or segment within the Claim Number. |
| Vehicle/Property |
The year, make, and model of the vehicle. |
| Insured | The insured's name (last name, first name). |
| Claim Created |
The date the claim was first entered. |
| Loss Date | The date the vehicle was damaged. |
| Name | Description |
|---|---|
| Claim/Policy | The Claim number (including any additional identifying number) and/or the policy number. |
| Responsibility | Filter estimates assigned to a specific adjuster or office. Select  to open the Resource Lookup window. to open the Resource Lookup window. |
| Insured/Claimant/Owner |
Select Insured, Claimant, or Owner, and enter the person's last name and phone number. |
| Vehicle Info | The VIN and license plate number of the vehicle in the claim. |
| Claim Created |
The date the claim was first entered. Select a range, or select the |
| Loss Date | The date the vehicle was damaged. Select a range, or select the  to choose an exact date. to choose an exact date. |
| With Estimates |
Filter estimates based on the source, the status, the date received, and/or the estimate gross dollar amount. To filter by source, select the check box to select the source type, and then select |