Manage Staffed Inspection Sites
Staffed Inspection Sites are service centers, drive-in facilities, or staging yards. In WorkCenter, create and manage sites, associate resources to the sites, and configure resource shifts so appraisal assignments can be scheduled.
How to
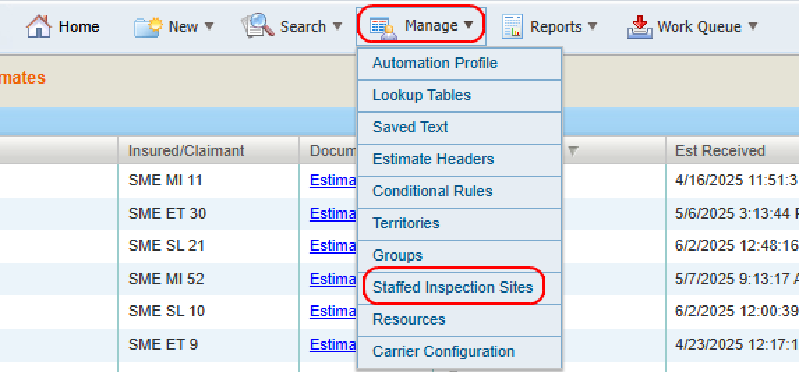
- On the Manage menu in the navigation bar, select Staffed Inspection Sites.
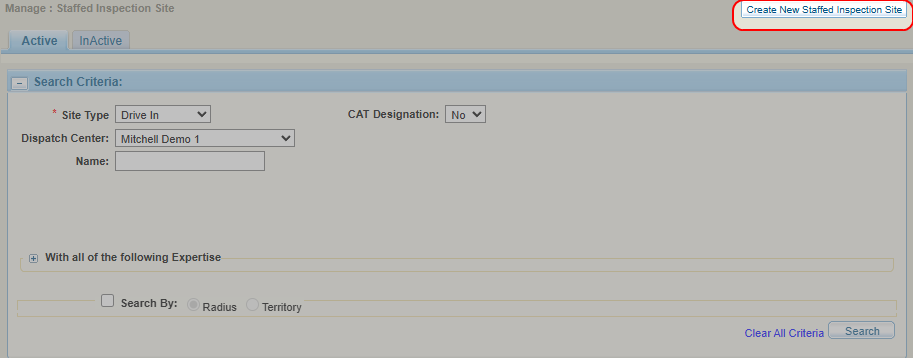
- Select Create New Staffed Inspection Site.
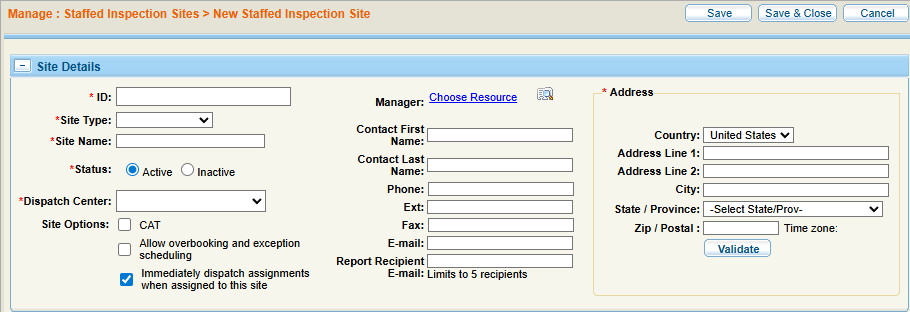
- In the Site Details section, complete the information as necessary.
- Add information in the Relationships, Hours of Operation, and Group Type Information tabs as necessary.
- Select Save.
-
On the Manage menu in the navigation bar, select Staffed Inspection Sites.
-
Select the Active or InActive tab.
-
Enter the desired search criteria.
-
Select Search.
-
View the search results on the page.
- Select the Hours of Operation tab.
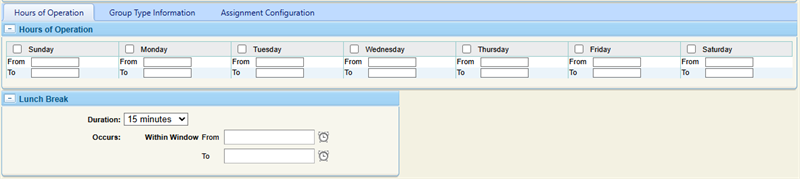
- Select the check boxes next to the days of the week that the center is open.
- In the From field for each day, enter the time the center opens. In the To field, enter the time the center closes.
- Optionally, in the Lunch Break section, enter a lunch break duration and window.
- Select Save.
-
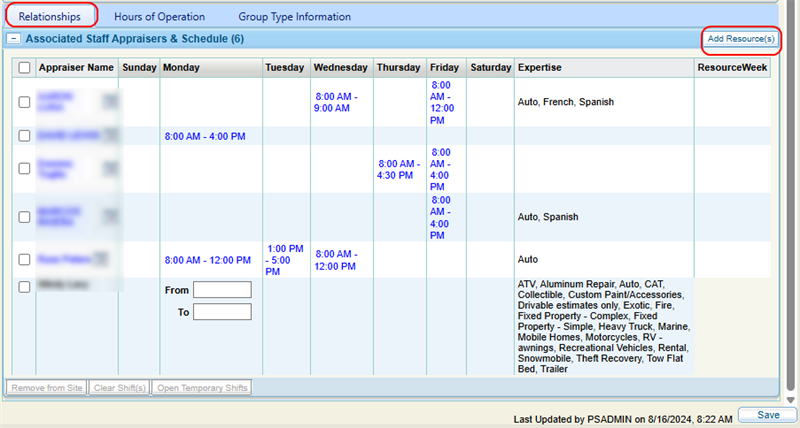
Select the Relationships tab.
-
Select Add Resource(s).
-
Use the Resource Lookup to search for and select a resource.
-
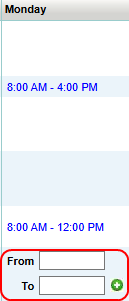
Select Add Shift for each day of the week the resource has a shift.

-
Enter the shift start and end times.
-
Select
 to add another shift on the same day.
 -
Once finished, select Save.
- Select the Relationships tab.
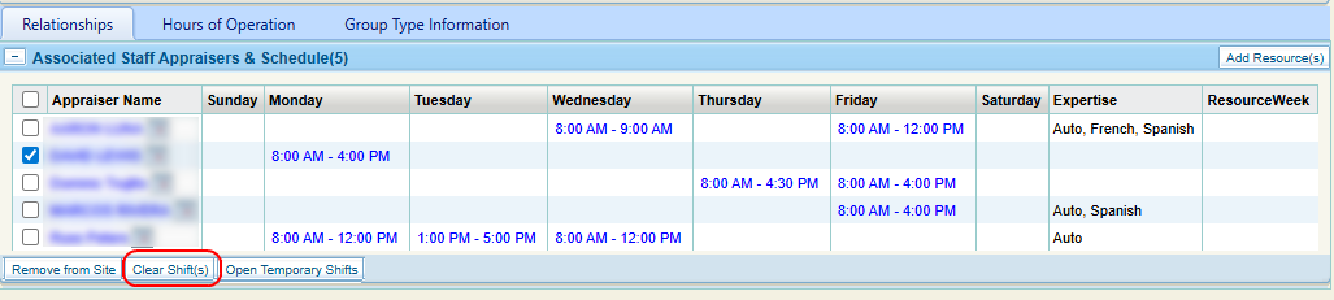
- In the Associated Resources & Schedule section, select the shift you want to remove.
- Do one of the following:
- Select
 .
. - Select Clear Shift(s).
- Select Save.
- Select the Relationships tab.
- In the Associated Resources & Schedule section, select the check box(es) for the resource(s) you want to remove.
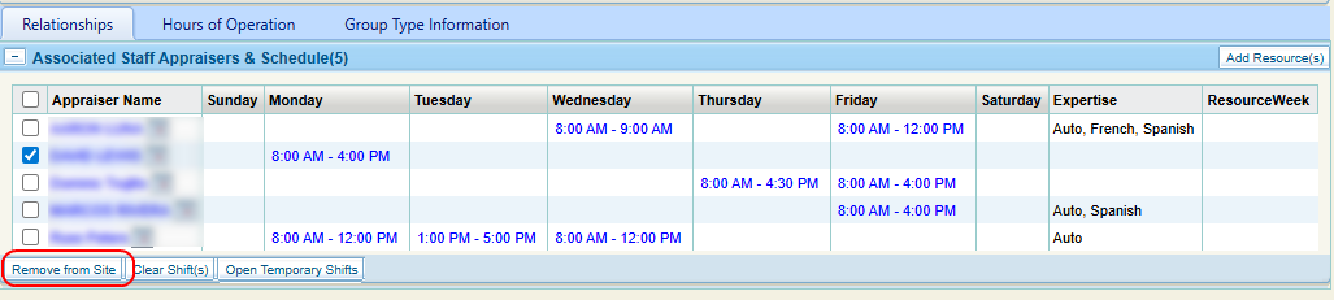
- Select Remove from Site.
- Select Yes, Remove.

- Select Save.
-
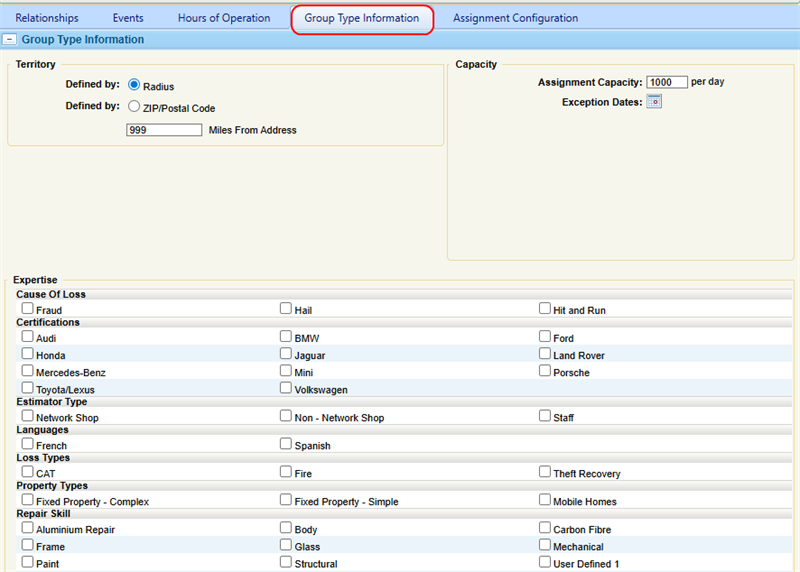
Select the Group Type Information tab.
-
Edit the information as necessary.
-
Select Save.
Reference
| Name | Definition |
|---|---|
| Site Type |
Select the type of site, such as Drive-in, Service Center, or Staging Yard. |
| Site Name | Enter a name for the site. |
| Status | Select Active or Inactive. Marking a site as inactive moves it to the Inactive tab. Its resources and shifts become available for reassignment but stay linked to that site, allowing quick reactivation without losing associations. |
| Dispatch Center | Select the Dispatch Center associated with the site. |
| Site Options |
Select the appropriate check boxes to further define the site. |
| Manager: Choose Resource |
Assign a manager to the site. Do one of the following:
|
| Contact Information | Enter contact information for the site. |
| Address | Enter the site address. |
| Validate | Select to validate the address (A complete address is required). When the address is validated, maps and directions to the resource and/or location are available. |