Generate Repair Documents in ShopPak
Generate Repair documents using information from your estimate. You can create the following:
- Repair Order: Customer document includes parts, labor, price, and grand total prior to the work being completed.
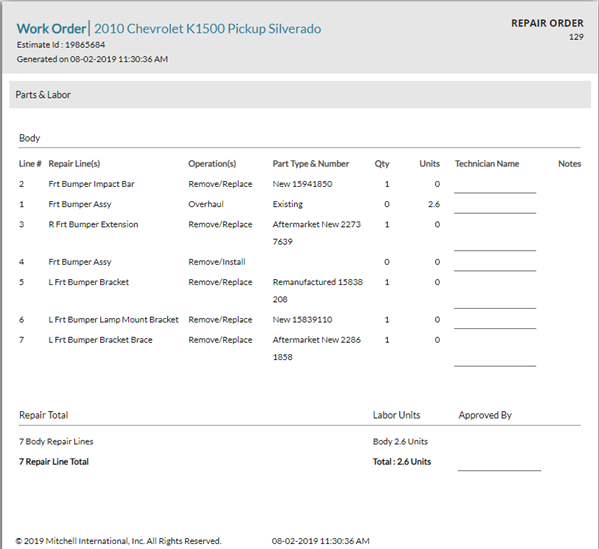
- Work Order: Shop document designed specifically for your technicians. It includes repair lines, operations, part number and type, and a section to enter technician names assigned to each repair line.
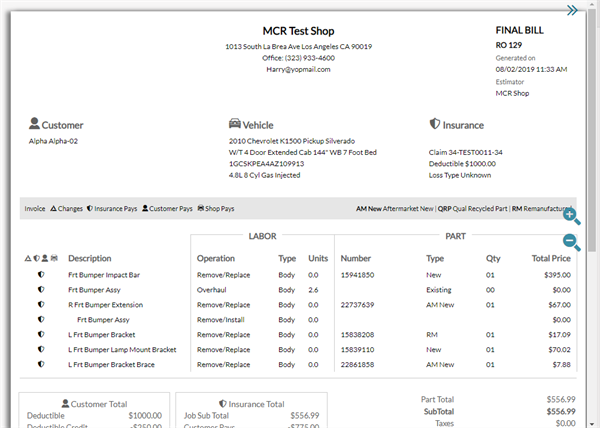
- Final Bill: Customer document includes parts, labor, price, and grand total after the work is completed.
How to
 Generate Repair Order Document
You can automatically generate the Repair Order with the information in your estimate. The Repair Order document is a customer-ready document that includes parts, labor, price, and grand total prior to the work being completed. You can print or download the document as a PDF.
- On the Job Overview page in Mitchell Connect, select the Repair Plan card (card view may vary if Repair QA is being used).
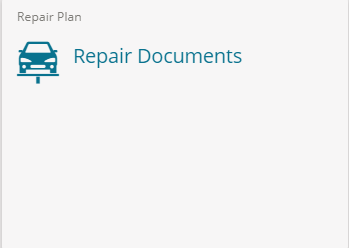
- On the any tab on the Repair Plan page, select Documents, and then select Repair Order in the Documents list.
- Review the document in the preview pane. Use the magnifying icons to zoom in or zoom out on the document as needed.


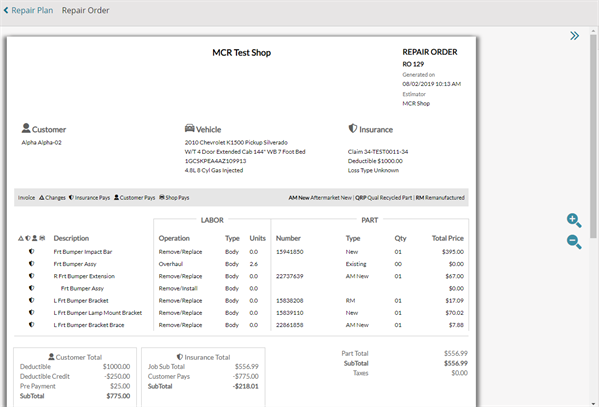
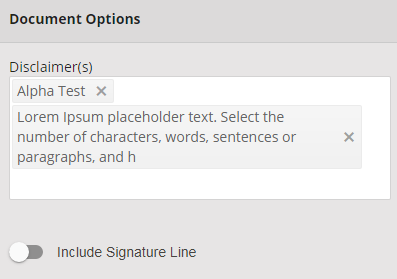
- Disclaimer text may be included by default. This text appears at the bottom of the document. To change the text, select the X next to the existing disclaimer title, then select the new disclaimer text in the list. You can also select disclaimer text in the list if a disclaimer does not appear by default.
- Do one of the following (optional):
- Turn on the Include Signature Line toggle to include a signature line at the bottom of the document.

- Turn off the Include Signature Line toggle to exclude the signature line from the bottom of the document.

- Do one of the following:
- Select Download: Download the document as a PDF to your computer. Open and save the PDF at the bottom of your browser (browsers may vary.
- Select Print: Print the document. Click Print from the Preview window (browsers may vary).
Generate Work Order Document
Automatically create the Work Order document using information from your estimate. The Work Order document is a shop document that includes repair lines, operations, part number and type, and a section to enter technician names assigned to each repair line.
- On the Job Overview page in Mitchell Connect, click the Repair Plan card (card view may vary if Repair QA is being used).
- On the Repair Plans page, select Documents, and then select Work Order in the Documents list.
- Review the document in the preview pane.
-
Turn on or Turn off the Hide Labor Units toggle
 to show or hide labor units.
 - Do one of the following:
- Click Download: Download the document as a PDF to your computer. Open and save the PDF at the bottom of your browser (browsers may vary.
- Click Print: Print the document. Click Print from the Preview window (browsers may vary).
Generate Final Bill Document
Automatically create the Repair Order document using information from your estimate. The Repair Order document is a customer document that includes parts, labor, price, and grand total after the work is completed. You can print or download the document as a PDF.
- On the Job Overview page in Mitchell Connect, select the Repair Plan card (card view may vary if Repair QA is being used).
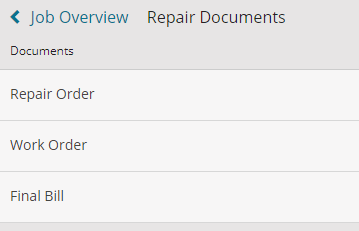
- On the Repair Documents page, click Final Bill.
- Review the document in the preview pane. Use the magnifying icons to zoom in or zoom out on the document as needed.
- Disclaimer text may be included by default. This text appears at the bottom of the document. To change the text, click the X next to the existing disclaimer title, then select the new disclaimer text in the list. You can also select disclaimer text in the list if a disclaimer does not appear by default.
- Do one of the following (optional):
- Move the toggle button next to Include Signature Line to the right to include a signature line at the bottom of the document.
- Move the toggle button next to Include Signature Line to the left to exclude the signature line from the bottom of the document.
- Do one of the following:
- Click Download: Download the document as a PDF to your computer. Open and save the PDF at the bottom of your browser (browsers may vary.
- Click Print: Print the document. Click Print from the Preview window (browsers may vary).
Generate Customized Cover Sheet
Cover Sheet with the option to include shop address and/or customer information.
-
On the Job Overview page, select the Repair Plan card.
-
From any tab on the Repair Plan page, select the Documents list.
-
Select Repair Order Labels in the Documents list.
-
Under Document Type, select Coversheet.
-
Under Document Options, turn on any of the following toggles
:
-
Include Shop Address: Include the shop address as entered in Settings.
-
Include Customer Information: Include customer name and address as entered on the Insured card.
-
Select Save to save your changes.
-
Do one of the following:
-
Select Download to download a PDF version of the cover sheet.
-
Select Print to open your print options where you can print or save the document.
Generate Key Tag Report
The Key Tag Report includes RO number, customer name, and vehicle information with an option to include a customer signature line.
-
On the Job Overview page, select the Repair Plan card.
-
From any tab on the Repair Plan page, select the Documents list.
-
Select Repair Order Labels in the Documents list.
-
Under Document Type, select Key Tag Report.
-
Under Document Options, turn on the Include Customer Signature toggle
if you want to include a customer signature line.
-
Select Save to save your changes.
-
Do one of the following:
-
Select Download to download a PDF version of the cover sheet.
-
Select Print to open your print options where you can print or save the document.
Generate RO Mirror Tag Report
This report includes shop name, RO (Repair Order) number, customer name, and vehicle details (year, make, model) in a compact format.
-
On the Job Overview page, select the Repair Plan card.
-
From any tab on the Repair Plan page, select the Documents list.
-
Select Repair Order Labels in the Documents list.
-
Under Document Type, select RO Mirror Tag Report.
-
Select Save to save your changes.
-
Do one of the following:
-
Select Download to download a PDF version of the cover sheet.
-
Select Print to open your print options where you can print or save the document.
Related topics